


How Should I Evaluate the Color Change Cleaning Time and Material Waste of the All-Electric Extrusion Blow Molding Machine?
At our facility in Shantou, we frequently test new high-density polyethylene (HDPE) blends 1, and we know that nothing kills profit margins faster than a machine sitting idle during a color switch. You watch the clock tick while your operator purges kilograms of expensive resin, trying to clear those stubborn black streaks. If you choose a machine with poor flow geometry, you are essentially signing up for years of wasted material and lost production hours.
To evaluate color change efficiency, you must look beyond the brochure and demand a "Black-to-White" physical demonstration. Key performance indicators include verifying a "First-In, First-Out" die head design, ensuring internal surface finishes meet Ra < 0.05 µm, and testing servo-driven "vibration purge" capabilities. These factors determine whether a changeover takes 20 minutes or two hours.
You need a systematic approach to validate these claims before you sign the contract.
How does the die head design minimize dead spots to speed up color changes?
Our engineering team spends countless hours polishing flow channels because we know that even microscopic roughness acts like sandpaper to pigment. If the molten plastic hangs up in a sharp corner inside the head, it degrades into carbon 2, causing defects that can haunt your production run for days.
A die head minimizes dead spots by utilizing a "Cardioid" or heart-shaped distribution channel that ensures a strict First-In, First-Out (FIFO) flow path. This geometry, combined with a mirror-polished internal surface (Ra < 0.02–0.05 µm), eliminates right-angle stagnation zones where old resin accumulates, allowing the new color to flush the system efficiently with minimal back pressure.

When you dig deeper into the mechanical design of the extrusion head, you are looking for specific engineering choices that facilitate flow. The biggest enemy of a fast color change is the "dead zone." This is an area inside the die head where the velocity of the plastic flow drops to near zero. In these areas, the old color (especially heat-sensitive pigments like red or black) sits and cooks.
The Importance of "Cardioid" vs. Right Angles
In older or cheaper machine designs, manufacturers often use "Spider" heads or designs with sharp 90-degree turns. These are notorious for trapping material behind the spider legs. For modern all-electric machines, you should insist on a Cardioid (Heart-shaped) или Спиральная оправка design. These shapes split the flow stream gradually and wrap it around the core, ensuring that the plastic entering first is also the plastic exiting first (FIFO).
Surface Finish Metrics
You cannot judge the inside of a head with the naked eye alone. You need to ask for the roughness certification. The industry standard for high-performance heads involves hard-chrome plating followed by mirror polishing.
Comparing Die Head Features
| Характеристика | Low-End Standard | High-Performance Requirement | Impact on Color Change |
|---|---|---|---|
| Flow Channel Design | Spider / Right Angle | Cardioid / Spiral Mandrel | High: Determines if "dead zones" exist. |
| Surface Roughness (Ra) | > 0.1 µm | < 0.05 µm (Mirror Polish) | Medium: Rough surfaces trap pigment particles. |
| Plating | Standard Nitriding | Hard Chrome Plating | Medium: Chrome provides a slicker release surface. |
| Assembly Design | Single Block | Split/Hinged Design | High: Accessibility for manual cleaning if purging fails. |
The Mixing Section Trap
Be careful with the extruder screw’s mixing section. While a Maddock mixer is great for homogenizing the melt temperature, it can be a nightmare for color changes if designed poorly. We advise checking that the mixer flutes are "swept" or "open" rather than having blind undercut slots. If the mixer has blind spots, no amount of purging will clean it; you will have to pull the screw.
Can you demonstrate a color change from black to white during the trial run?
We have hosted many Factory Acceptance Tests (FAT) 3 where clients bring their most difficult resins to see if our machine can handle them. Theoretical output numbers on a spreadsheet are meaningless if the machine cannot clear a dark pigment without wasting three hours of production time.
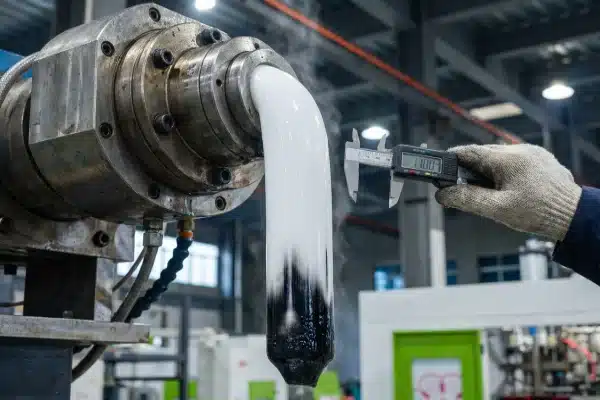
You must mandate a "Black-to-White" challenge during the acceptance test, requiring the machine to produce a clean, streak-free parison within a specific shot count or material volume. This stress test exposes hidden flaws in the adapter zone and confirms if the machine meets the "Purge Factor" metric of using less than four times the barrel volume.

Do not settle for a standard "Natural-to-Colored" test, which is too easy. Going from a light color to a dark color hides flow problems because the dark pigment easily covers the light residue. The real test of a machine’s efficiency is going from Black (or Dark Blue) to White (or Natural).
The "Purge Factor" Calculation
To quantify waste, we use a metric called the "Purge Factor." This helps you compare different machines objectively. The formula is simple: divide the total weight of the purge material used to get a clean parison by the total internal volume (weight capacity) of the extruder barrel and head.
- Efficient Machine: Uses 3–4x the barrel volume.
- Average Machine: Uses 5–6x the barrel volume.
- Poor Design: Uses >7x the barrel volume.
For example, if your system (barrel + head) holds 5kg of plastic, a top-tier machine should be clean after purging roughly 15kg to 20kg of resin. If you are purging 50kg and still seeing streaks, the internal geometry is flawed.
all-electric machines 4
The Hidden Bottleneck: The Adapter
Often, the extruder is fine, and the die head is fine, but the problem lies in the middle. The Adapter connects the extruder to the die head. In our assembly process, we pay strict attention to this transition. If the bore diameter changes abruptly without a smooth taper, it creates a "shoulder" where material hangs up.
Acceptance Test Checklist
When you visit the factory for the trial run, use this table to grade the performance.
| Test Step | Метрика | Acceptance Goal | Why it Matters |
|---|---|---|---|
| 1. Preparation | Time to heat/prep | < 20 Minutes | Quick setup reduces energy loss. |
| 2. The Purge | Material Consumed | < 4x Barrel Volume | Direct impact on raw material costs. |
| 3. Cleanliness | Parison Visual | No visible streaks | Ensures bottle wall quality. |
| 4. Stability | Shots to Stable | < 20 Shots | "Clean" plastic must also be thermally stable. |
By enforcing these strict criteria, you prevent the scenario where a supplier ships a machine that "works," but bleeds money every time you change a product color.
burning PVC 5
Do the servo motors offer specific purge programs to reduce changeover time?
When we calibrate our flight controllers and servo drives, we utilize the unique precision of electric motors to do things hydraulic systems simply cannot. A hydraulic screw turns at a steady RPM, but an electric servo can execute complex velocity profiles that aggressively scrub the barrel.
Human Machine Interface 6
Servo motors offer advanced purge programs like "Vibration" or "Oscillation" modes, which rapidly fluctuate screw RPM to create turbulence that breaks the boundary layer of plastic clinging to the barrel walls. Additionally, electric back-pressure servos allow for automated "pressure pulsing" recipes, significantly reducing the manual labor and material required for a changeover.

The transition to all-electric machinery is not just about saving energy; it is about process control. In a hydraulic machine, trying to rapidly oscillate the screw speed creates massive heat and wear on the valves. In an all-electric machine, the servo motor can change speed in milliseconds.
servo-driven "vibration purge" capabilities 8
The Physics of Vibration Purging
Plastic flowing through a barrel acts like water in a pipe—the material in the center moves fast, while the material touching the metal walls (the boundary layer) moves very slowly. This boundary layer is where the old color hides.
- Standard Purge: Constant RPM. The center flows out, but the boundary layer sticks.
- Vibration/Oscillation Purge: The servo ramps the screw from, say, 5 RPM to 100 RPM and back, repeatedly. This creates "turbulence" and shear stress that physically rips the boundary layer off the metal wall.
Recipe-Driven Changeovers
We strongly recommend utilizing the HMI (Human Machine Interface) to save "Purging Profiles." Instead of relying on an operator’s "feel" or "art" to clean the machine, you define a standard program. This ensures that the night shift cleans the machine exactly as efficiently as the day shift.
Dynamic Back Pressure
Another feature specific to electric machines is the precise control of back pressure. During a purge, you want to alternate between:
- High Back Pressure: This fills the screw flights completely, forcing the plastic to scrub against the barrel.
- Low Back Pressure: This allows the material to flush out rapidly.
An electric machine can automate this "Pulse Scrubbing" cycle without operator intervention.
internal surface finishes 9
Comparative Analysis: Manual vs. Servo Programmed
| Метод | Operator Effort | Consistency | Материальные отходы | Risk of Screw Damage |
|---|---|---|---|---|
| Manual Hydraulic Purge | High (Constant adjustment) | Low (Varies by person) | Высокий | Средний |
| Chemical Purge Only | Низкий | Высокий | Medium (Cost of chemical) | Низкий |
| Servo "Vibration" Program | Zero (One button) | High (Repeatable) | Самый низкий | None (Torque limited) |
Screw Pull Accessibility
Finally, even with the best technology, accidents happen (e.g., burning PVC or overheating sensitive additives). If a purge fails, you must physically remove the screw. We design our machines with "Rear Extraction" or quick-release couplings. Check the mechanical design to ensure the screw can be pulled without disassembling the entire extrusion platform. If screw removal takes 8 hours, that is a day of lost production; a good design should allow removal in under 90 minutes.
Заключение
Evaluating a blow molding machine requires skepticism and physical verification. By demanding a "Black-to-White" trial, verifying Cardioid head geometry, and utilizing servo-driven vibration purge cycles, you can ensure your new equipment minimizes waste and maximizes uptime.
kilograms of expensive resin 10
Сноски
- Defines the primary material discussed in the article. ↩︎
- Explains the chemical result of plastic degradation in dead spots. ↩︎
- Defines the industry-standard testing procedure mentioned. ↩︎
- Stable Wikipedia definition matching the technical anchor text. ↩︎
- Stable Wikipedia page for the material, covering its thermal properties. ↩︎
- Explains the control system interface used for purging profiles. ↩︎
- Refers to the industrial standard for coating die head components. ↩︎
- Technical background on the motors used for precision control. ↩︎
- Links to international standards for industrial surface quality measurements. ↩︎
- Explains the raw material used in extrusion blow molding. ↩︎


0 Комментариев