


Mastering HDPE Detergent Bottle Production: A Guide to Extrusion Blow Molding
How do I adjust extrusion temperatures for HDPE detergent bottles? What are the best practices for using PCR in detergent bottle manufacturing? How can I prevent stress cracking in my HDPE bottle production? Do I need a multi-layer die head for chemical resistant containers?
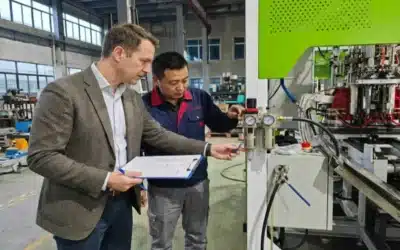
I hear these questions every single week. As the Technical Sales Manager at LEKAmachine, I talk to factory owners from Poland to Mexico who are all facing the same battle. You are trying to make high-quality detergent bottles that look great on the shelf, but you are also under huge pressure to use recycled materials (PCR) and cut energy costs.
It is a tough balance. Making a simple water bottle is one thing. Making a detergent bottle that holds aggressive chemicals, resists cracking, and uses 50% recycled plastic? That is a real engineering challenge.
Most people think buying the machine is the hard part. It is not. The hard part is mastering the process. The difference between a profitable factory and one that struggles is often just a few degrees of temperature or a slight change in die geometry.
In this guide, I am going to walk you through the exact processing strategies I share with my clients. We are going to look at temperature profiles, how to handle recycled material without ruining your machines, and how to stop bottles from cracking.

1. The Real Secret to Temperature Control
Most people think setting the temperature on an extruder is just about melting the plastic pellets. If you just set a flat temperature across the barrel, you are missing the big picture.
HDPE is a semi-crystalline polymer. It takes a lot of energy to turn those solid pellets into a melt. But here is the thing: on a modern high-speed machine, like our Série AERO ou Série TITAN, most of that heat doesn’t come from the electric heater bands. It comes from shear heat.
Shear heat is the friction created when the screw spins and grinds the pellets against the barrel wall. Once your screw speed is set, that heat is happening whether you want it or not. The heater bands can add heat, but they can’t easily remove shear heat.

The "Reverse Ramp" Strategy
This is why I often recommend a "Reverse Ramp" or "Hump" profile. It sounds backward, but it works.
You want your Transition Zone (the middle part of the screw) to be the hottest part. You need to pump energy in right there to break down the crystals quickly. If you wait until the end of the screw to melt the plastic, you will get un-melted gels in your bottle walls.
But as you get to the Metering Zone (the end), you actually want to lower the temperature settings. Why? Because you need to stabilize the melt and stop it from getting too hot from all that friction. If it gets too hot, the plastic loses its strength, and your parison (the hot tube of plastic) will stretch and sag like melted cheese.
Here is a strategic starting point for your temperature settings:
Table 1: Strategic Temperature Profiling for HDPE EBM (Detergent Applications)
| Zone | Fonction | Setpoint Range (°C) | Why This Works |
|---|---|---|---|
| Zone 1 (Feed) | Moving the solids forward | 175°C – 185°C | You need friction here. If it is too hot, pellets melt too early and slip. |
| Zone 2 (Transition) | Melting and Compression | 195°C – 215°C | This is the "Hump." We blast heat here to melt crystals fast. |
| Zone 3 (Metering) | Mixing and Homogenizing | 190°C – 205°C | We cool it down slightly to control viscosity and remove shear heat. |
| Adapter/Screen | Filtering the melt | 200°C – 210°C | Keeps pressure steady as it moves to the head. |
| Die Head | Forming the Parison | 210°C – 230°C | Higher heat here polishes the surface for a glossy finish. |
Dive Deeper: The Hidden Danger of Residence Time
There is a nuance to temperature that catches a lot of operators off guard. It is called Residence Time. This is simply how long the plastic sits inside the hot barrel. It sounds simple, but it is the cause of so many headaches.
Imagine you are running a high-speed line. Suddenly, you have a problem with the mold. You hit the stop button. The screw stops turning. But the heat is still there. During a startup, or if you have to stop the machine for a mold change, that HDPE is sitting inside a 200°C metal tube. It is baking.
If HDPE sits stagnant at processing temperatures for more than 15 or 20 minutes, it starts to oxidize. It burns. The chemical chains start to break down and then reconnect in weird ways. When this happens, you get carbonized specs—little black dots in your bottles. Or worse, you get "cross-linked gels." These are hard little lumps of degraded plastic that look like clear fish eyes.
I recall visiting a client who was complaining about "bad resin" because his bottles were failing drop tests. We looked at the broken bottles and found tiny, hard gels in the wall thickness. It turned out his operators were leaving the heat on during 45-minute lunch breaks without purging the machine. That stagnant plastic was degrading inside the barrel, forming weak points.
If one of those lumps ends up in the wall of a detergent bottle, it acts like a stress concentrator. It creates a weak point. If that bottle is dropped, it will crack right at that gel. I always tell my operators: if you need to pause the machine for more than 15 minutes, drop your barrel temperatures to 150°C–160°C immediately. This keeps the plastic soft enough to restart later, but cool enough that it won’t degrade and ruin your next batch of bottles.
2. Avoiding the "Sharkskin" Look
Detergent bottles need to look good. They are competing on a shelf with huge brands. You want a smooth, glossy surface.
Sometimes, you might see a defect that looks like the skin of a shark—rough, repetitive, scale-like lines on the bottle. This is called Melt Fracture or Sharkskin.
This happens when the plastic is being pushed out of the die head too fast. The material is sticky. As it exits the metal die, the outer layer sticks to the metal while the inner layer keeps moving. It stretches and snaps, creating that rough texture.
To fix this, we have to play with the Shear Rate. You could slow the machine down, but that costs you money. A better way is to use Polymer Processing Aids (PPAs). These are additives that coat the metal die with a microscopic layer of lubricant. It lets the plastic slip out smoothly without sticking, so you can run your machine faster and still get a glossy finish.
Also, look at your die design. A longer "die land" (the parallel part of the lips) helps the plastic relax before it exits, which can smooth out the flow.

3. The PCR Problem: Mixing Oil and Water
Using Post-Consumer Recycled (PCR) material is the biggest trend I see right now. My clients in Europe are pushing hard for this. But running PCR is messy.
The main issue is contamination. When recycling centers wash old plastic, they can separate PET (water bottles) easily because it sinks in water. But HDPE (milk jugs, detergent bottles) floats. Do you know what else floats? Polypropylene (PP)—caps and closures.
So, your "100% rHDPE" usually contains about 2% to 10% PP contamination.
Here is the problem: HDPE and PP do not like each other. They don’t mix. It is like oil and water. The PP stays as little distinct blobs inside the HDPE. These blobs don’t stick to the surrounding plastic. If you drop the bottle, the stress travels through the wall until it hits a PP blob, and crack—the bottle fails.
Dive Deeper: Why Filtration Changes Everything
When you buy virgin resin, it is clean. You trust it. When you buy PCR, you don’t really know where it has been. Even the best suppliers send bales that contain microscopic bits of paper, aluminum foil, or wood.
You absolutely must use screen packs in your extruder. For virgin material, a coarse screen (like 60 mesh) is fine. But for detergent bottles made with PCR, I tell my clients to use 100 or 120 mesh screens. This catches the small stuff that causes leaks.
But this creates a new challenge: Back Pressure. Pushing thick, molten plastic through a fine mesh like 120 is hard work. It puts a huge load on the extruder motor and the thrust bearing. But more importantly, it generates heat.
Remember our talk about shear heat? The friction at the screen changer can raise the melt temperature by 10 or 15 degrees. This is dangerous. If you are running fine screens for PCR, you often need to lower your Metering Zone temperature even more to compensate for this extra heat spike. If you don’t, you will degrade the material right before it enters the die head.
I also highly recommend using continuous screen changers on your machine. If you use a manual one, every time you stop to change a clogged screen, you are losing production time. But worse, you are stopping the flow of plastic. That stop creates a heat soak (residence time issue) that degrades the plastic sitting in the barrel. A continuous changer lets you swap screens without stopping the screw, keeping the process stable and the plastic fresh.
4. Chemistry to the Rescue: Compatibilizers
Since we know there is PP contamination in the PCR, and we know it causes cracks, how do we fix it? We use chemistry.
You need to use Compatibilizers. These are special additives (often Styrenic Block Copolymers). Think of them as molecular stitches.
One end of the molecule loves polyethylene. The other end loves polypropylene. When you mix this into your resin (usually at about 3% to 5%), it seeks out those little blobs of PP contamination. It stitches them into the HDPE matrix.
This does two things:
- It makes the PP blobs smaller and more dispersed.
- It bonds them to the HDPE so they don’t create weak points.
I have seen clients take a 100% PCR bottle that failed every drop test, add 4% compatibilizer, and suddenly it performs almost like virgin material. It is an extra cost, but it is cheaper than having your bottles leak in a supermarket truck.
5. The Silent Killer: Stress Cracking (ESCR)
Environmental Stress Crack Resistance (ESCR) is a huge deal for detergent bottles.
Detergents contains surfactants—soaps. Surfactants are lubricants. They don’t eat the plastic chemically; they lubricate the polymer chains. If there is stress on the bottle (like a heavy stack of boxes on top of it), the polymer chains want to slide apart. The soap helps them slide. When they slide too much, the bottle cracks.
There is a trade-off you need to know: Stiffness vs. ESCR.
- High Density (Stiffness): If you use very high-density HDPE, the bottle is stiff and strong. But the molecular chains are packed so tight there are no "tie molecules" to hold it together. It cracks easily.
- Lower Density (ESCR): If you use a copolymer with lower density (like 0.950), it has more loose chains (amorphous regions) that tie the structure together. It resists cracking well, but the bottle is softer.
For detergent bottles, you usually need a density around 0.950–0.955 to get that balance.

Dive Deeper: The "Tie Molecule" Concept
To really understand why bottles crack, you have to look at the microscopic structure of HDPE. It is not one solid block. It is made of two things: crystals (which are hard and organized) and amorphous regions (which are messy and tangled like spaghetti).
The strength of your bottle comes from Tie Molecules. These are long polymer chains that thread through the messy amorphous region and anchor into two different crystals. They are like the ropes connecting two docks.
When a surfactant (soap) gets onto the plastic, it soaks into the messy amorphous regions. It lubricates those chains. If you have stress on the bottle, the chains start to slip. If you don’t have enough Tie Molecules connecting the crystals, the chains slip completely apart. That is a crack.
This is why high-density resin fails for detergent. High density means lots of crystals and very small amorphous regions. The chains are packed so tight that there is no room for those long Tie Molecules to weave back and forth. So, when the soap hits it, there is nothing holding the structure together.
By using a copolymer with a slightly lower density (using hexene or butene comonomers), you disrupt the crystallization. You force the plastic to create more amorphous space. This might sound bad, but it gives the long molecular chains room to entangle and tie the crystals together. It is these entanglements that fight against the lubricating effect of the soap. If you ignore this and just buy the cheapest generic HDPE, you are building bottles that are destined to leak.
6. Going Thin: Advanced Nucleation
Everyone wants to use less plastic. "Lightweighting" is the goal. But if you make the wall thinner, the bottle gets weak and soft.
This is where Hyper-Nucleation comes in. You can add advanced nucleating agents (like Milliken’s HPN) to the plastic. These additives force the plastic crystals to grow in a specific, flat direction.
It does two amazing things:
- Stiffness: It makes the plastic stiffer, so you can have a thinner wall that still holds a top load.
- Barrier: Because the crystals form a flat wall, it makes it harder for oxygen and moisture to pass through.
It allows you to decouple that Density vs. ESCR trade-off I just mentioned. You can keep the density lower for crack resistance, but use the nucleator to get the stiffness back.
7. Choosing the Right Tool: Die Head Geometry
The die head is the heart of the blow molding machine. It shapes the parison. There are two main types of tooling design, and picking the right one matters for detergents.
Table 2: Die Tooling Selection Matrix
| Fonctionnalité | Divergent Tooling | Convergent Tooling |
|---|---|---|
| Flow Path | Expands outward (trumpet shape) | Narrows inward (funnel shape) |
| Die Swell | Lower (more predictable) | Higher (parison gets thicker) |
| Stability | High (less curtaining/folding) | Modéré |
| Meilleure application | Large Industrial Jugs (>2L) | Small Shampoo/Cleaner Bottles (<1L) |
For large containers, I usually prefer divergent tooling because it stabilizes the parison flow. But for smaller, high-detail bottles, convergent is often better for weld strength.
Dive Deeper: The Magic of Parison Programming
If you are making a square detergent bottle with a handle, simple tooling is not enough. Think about the geometry. When you blow a round parison into a square mold, the plastic has to stretch further to reach the corners than it does to reach the flat sides.
If your parison has the same thickness everywhere, the corners of your bottle will end up paper-thin because they stretched so much. The flat panels will be thick and heavy. This is a waste of material and a quality risk.
This is where Parison Programming becomes essential. It is not just a luxury; it is a necessity for non-round bottles. A parison programmer uses a hydraulic actuator to move the die mandrel up and down while the tube is extruding. It changes the gap thousands of times per second.
We program the machine to make the parison thicker exactly at the points that will become the corners and the handle. We make it thinner in the areas that will become the flat panels. This gives you a bottle with uniform wall thickness, even though the shape is complex. It saves a massive amount of plastic—sometimes up to 15% or 20% of the bottle weight—because you don’t have to over-engineer the whole bottle just to keep the corners safe.
Modern programmers allow for 100-point profiles. This means you can reinforce specific weak spots, like the base pinch-off or the handle radius, without adding weight to the rest of the bottle. It is the single most effective tool for lightweighting.
8. The Future is Multi-Layer
If you are using high percentages of PCR, you have a problem: PCR is grey, green, or yellow. It smells like old plastic. It doesn’t look premium.
The solution is Co-Extrusion. This is where we use a machine with multiple extruders feeding into one head to create a sandwich structure.
The standard for sustainable detergent bottles is the A/B/A Structure:
- Outer Layer (A): 10-20% Virgin material with color. This gives you the perfect surface finish and bright color.
- Core Layer (B): 60-80% PCR. This is where you hide the ugly recycled plastic.
- Inner Layer (A): 10-20% Virgin material. This protects the liquid from touching the recycled plastic.
This structure saves a fortune on masterbatch (color) costs because you are only coloring the thin outer layer, not the whole wall.

Dive Deeper: The Economics of Color Savings
Many people think multi-layer machines are just for fancy, high-end products. They assume the technology is too expensive for everyday items. Actually, the math proves the opposite. Multi-layer machines often pay for themselves just through raw material savings.
Imagine you are making a bright orange laundry detergent bottle. To get that solid orange color with grey PCR mixed in, you have to add a lot of pigment. Masterbatch (color concentrate) is expensive—often 5 to 10 times the price of the base resin.
If you make a solid mono-layer bottle, you have to color the entire thickness of the wall. You are burying expensive pigment deep in the middle of the wall where nobody ever sees it. It is literally money hidden inside the plastic.
With an A/B/A structure, you only put the color in the thin outer layer (maybe 15% of the total weight). You reduce your masterbatch usage by 80% or more. Plus, you can use the cheaper, uncolored PCR in the middle layer without worrying about color matching. Even though a multi-layer machine like our Série FORMA costs more upfront, the savings on raw material—specifically colorant and virgin resin—pay for the machine very quickly. I have seen ROIs of less than 18 months just based on colorant savings alone.
9. Beyond Fluorination: EVOH Barriers
For a long time, if you had a chemical that wanted to evaporate through the plastic, you would send the bottles to be "Fluorinated." They would treat the surface with fluorine gas.
That is changing fast. Governments and retailers are cracking down on fluorination because it can create PFAS (Forever Chemicals).
The best alternative is EVOH. This is a 5-layer co-extrusion method. You put a very thin layer of EVOH resin in the middle of the bottle wall. EVOH is an incredible barrier to oxygen and solvents.
Dive Deeper: The Regulatory Risk of Fluorination
You need to pay attention to this if you are exporting to the US or Europe. The EPA and other regulatory bodies have found a link between the fluorination of HDPE containers and the creation of PFAS—specifically PFOA and PFOS. These are known as "forever chemicals" because they never break down in the environment or the human body.
Because of this, many major brands and retailers are quietly banning fluorinated bottles from their supply chains. If you are a contract manufacturer (OEM), you do not want to be the one factory still offering a banned technology. You risk losing your biggest contracts overnight.
This is driving the massive shift toward EVOH co-extrusion. EVOH is a structural resin. It is co-extruded into the bottle wall, usually in a 5-layer setup (HDPE / Tie / EVOH / Tie / HDPE). It provides an excellent barrier to solvents and oxygen. It keeps the fragrance inside the detergent (where you want it) and keeps oxygen out. Most importantly, it is PFAS-free. While EVOH can complicate recycling slightly, the Association of Plastic Recyclers (APR) generally accepts it if the layers are thin enough. It is the future-proof solution for chemical resistance, ensuring your factory remains compliant as regulations get tighter.
10. Troubleshooting Your Process
Even with the best settings, things go wrong. Here is a quick guide to the most common defects I see in detergent production.
Table 3: Troubleshooting Matrix for Detergent Bottles
| Défaut | Symptom | Cause probable | Mesures correctives |
|---|---|---|---|
| Rocker Bottom | Base bulges out, bottle spins | Insufficient cooling in the pinch-off | The pinch-off is thick and holds heat. Use Beryllium-Copper inserts in the mold base to suck heat out faster. |
| Paneling | Bottle walls collapse inward | Vacuum inside the bottle | The barrier is too good, or the liquid is absorbing oxygen. Check venting or increase wall thickness. |
| Orange Peel | Surface roughness | Melt fracture / High Shear | Increase the die temperature, reduce screw speed, or check your PPA additive level. |
| Burn Marks | Black specs or streaks | Material degradation | You have a "dead spot" in the head or dirty screw. Clean the die head and check for trapped air. |
| Handle Webbing | Parison folds in the handle area | Parison too wide | Adjust the die gap or use "spreading pins" to hold the parison straight. |
How LEKAmachine Fits In
I know this is a lot of technical detail. But this is the level of detail required to be profitable in the detergent packaging game today. You can’t just buy a cheap machine and hope for the best.
At LEKAmachine, we design our equipment specifically to handle these challenges.
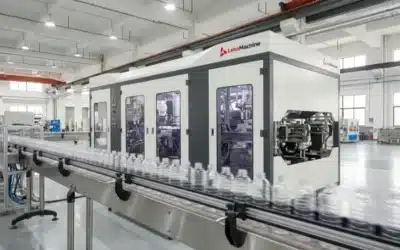
- For High PCR: Notre Série FORMA et le Série TITAN offer specialized screw designs with mixing elements that ensure your PCR blends are homogenized perfectly before they hit the mold.
- For Energy Savings: We use servo-driven systems that drastically cut electricity usage—critical when you are running heavy industrial cycles.
- For Multi-Layer: We specialize in the co-extrusion technology needed for A/B/A or EVOH setups, allowing you to save money on colorant and meet sustainability targets without sacrificing quality.
If you are struggling with stress cracks, high energy bills, or just can’t get your PCR bottles to look right, let’s talk. I can look at your current setup and help you figure out if it is a process issue or a machine limitation.
Are you ready to optimize your detergent bottle production line?
Contact me directly at slany@lekamachine.com or visit www.lekamachine.com. Let’s get your production running smooth and profitable.


0 commentaires